The updated version of Sony gamepads also got a new name – instead of DualShock, they were named DualSense. Along with the name, the appearance and design of the device have changed, and the characteristics – the autonomy became more, the tactile sensation and vibration response became better. But even the newest gadgets are not immune to breakage, so here is how to disassemble PS5 DualSense controller properly.
Why Do You Need to Teardown DualSense?
There can be many reasons why it needs to be disassembled. Gamepad is an always in use device, which means that it is exposed to a lot of stress. Among the possible causes most often highlighted are the following:
- Clean DualSense. Dust and dirt can collect inside despite the rather sealed casing, which is especially dangerous to get sweet carbonated drinks.
- Repair and replacement of components. Some elements may break down after a fall or prolonged wear and tear. Then it will be advisable not to buy a new controller but to replace a small part.
- Buttons are sticking. Sometimes it also happens that the controls don’t press or stick. In this case, removing the dirt will help.
If you disassemble the DualSense gamepad by yourself, it will automatically lead to the withdrawal of the manufacturer’s warranty.
Before disassembling, it is recommended to take the controller to a service center. If there is no choice, it is important to understand that there are fragile parts inside, and an untrained person can do even more damage than subdue, proceed with caution.
Needed Equipment
It is better to prepare the tools from the list at once so as not to be distracted. The principle of preparation is similar to cleaning the console from debris. So, you will need:
- A cross-head screwdriver of the right size;
- Tweezers;
- A plastic spatula;
- An organizer or magnetic mat;
- A soldering iron (only if the purpose of disassembly is to replace the vibration motors);
- Anti-static brush;
- A can of compressed air;
The process of assembly and disassembly by an inexperienced person takes 40 minutes. But, fear not, the design is quite simple, and understanding it is not difficult. Naturally, the organizer and tweezers make the work a lot easier. However, you can do it without them – there are not many screws, and almost all of them are the same size.
PS5 DualSense Controller Disassembly
The instructions below will be broken down into subparagraphs to make sure everything goes smoothly.
Official Sony note about the gamepad will also be of interest to you.
Black Inserts and Triggers
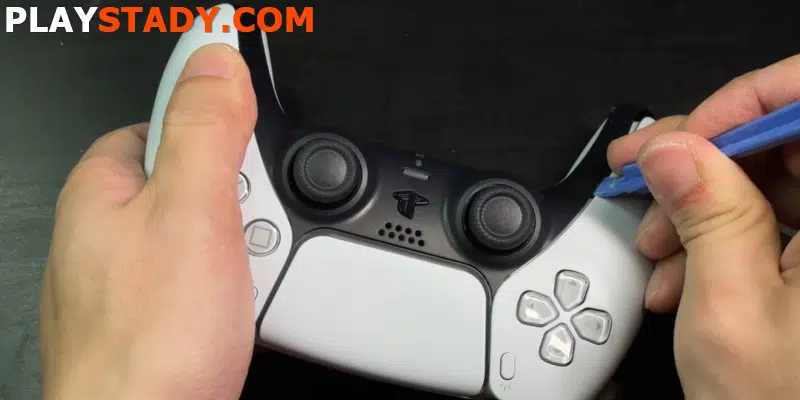
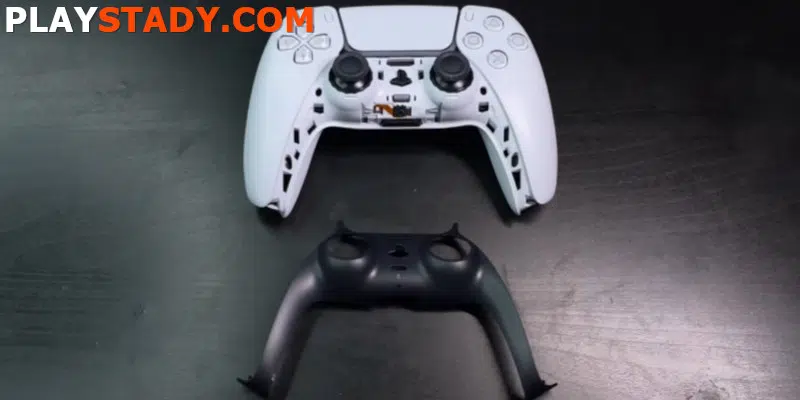
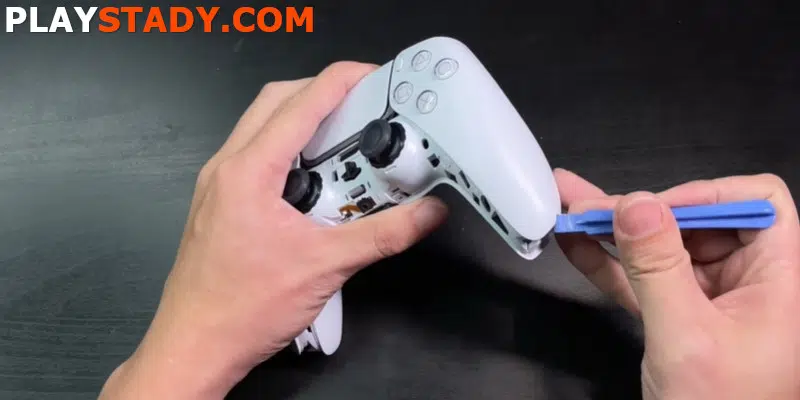
The case of the PS 5 gamepad looks quite aesthetically pleasing, and with a cursory inspection, you can’t find any screws or other ways to disassemble it. Everything is made much easier – you need to pick up and remove the black front panel. You can do it with the back of a spatula, but you can use any other suitable tool, mainly made of plastic. Prying the edges with an instrument made of iron will leave marks and dents on the surface. In addition to the unpleasant appearance, it threatens to get dirt and dust inside.
Lift the black panel. You can start from the bottom, right under the joysticks. Then carefully go around the entire perimeter and remove the panel.
Now, without delaying the tool, undo the buttons L1 and R1. They are easy to remove. You have to pry from the front side.
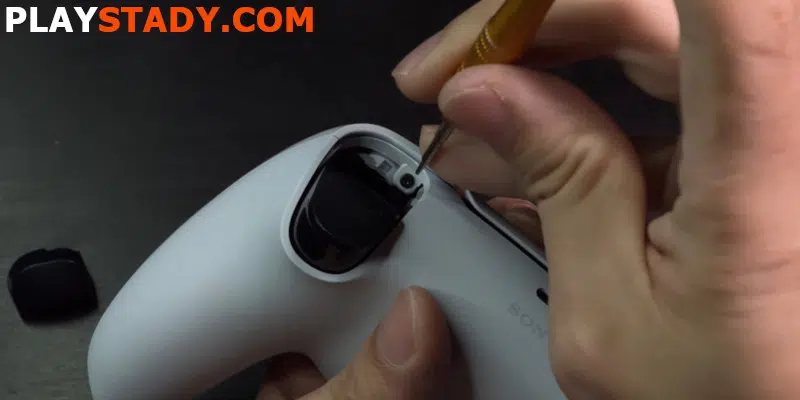
Also, under the buttons L1 and R1, there are two more screws. Unscrew them.
Rear Panel
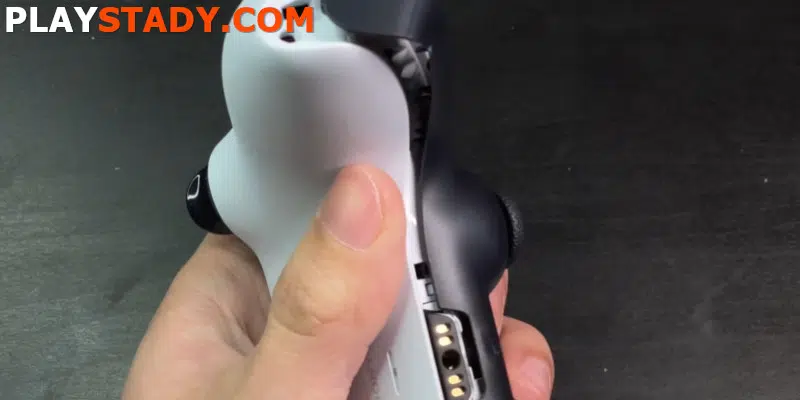
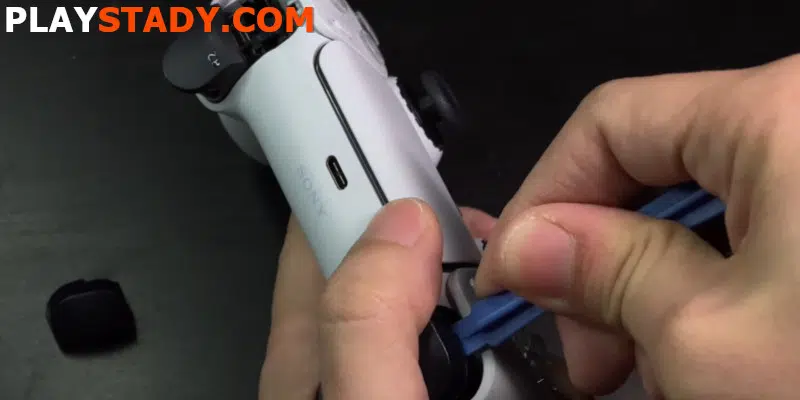
Next, you need to remove the cover of the DualSense gamepad. We again take a plastic tool and, starting from the lower edge to the upper one, pry it off. But don’t be in a hurry to remove it. At the bottom, on the sides of the headphone jack, there are two small latches made of plastic. Unhook them.
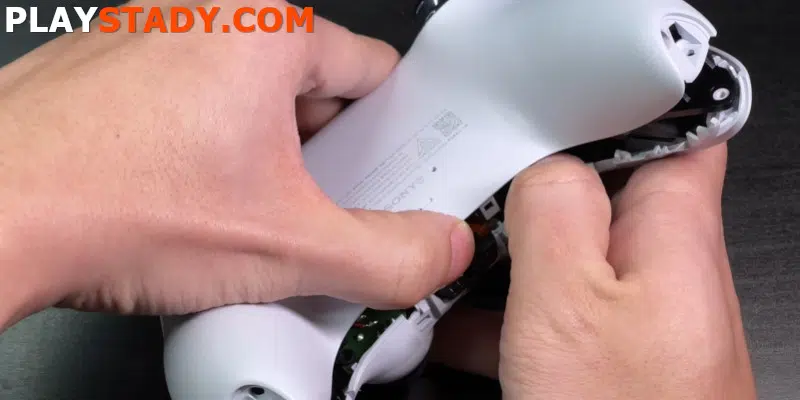
That’s it. The case is no longer held anywhere. Remove the back panel, gently holding the case.
Battery
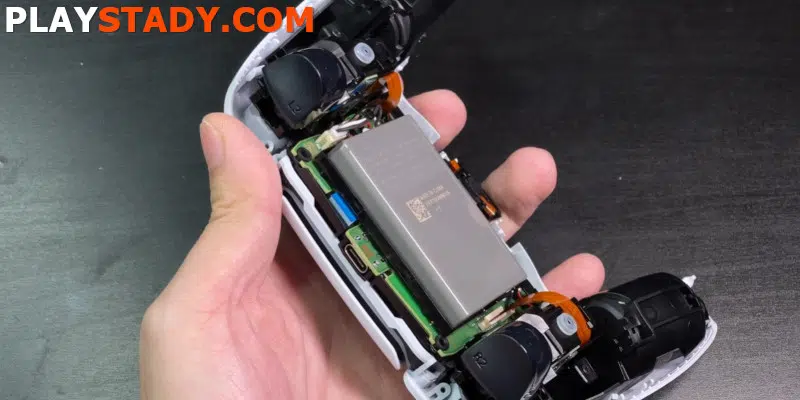
We see the joystick stuffing – the battery, the motherboard, the buttons. We remove the battery – it is held by only one small power plug on the right side. It is better not to pull it by hand but use tweezers. Do not pull the wires so as not to damage – only the plug’s body.
There is a particular slot under the battery. In the right lower part of it, there is another screw, which you have to unscrew. But that’s not all – there is also a built-in microphone on the plastic panel below. A single cable holds it. Pull it out with tweezers, and remove the panel.
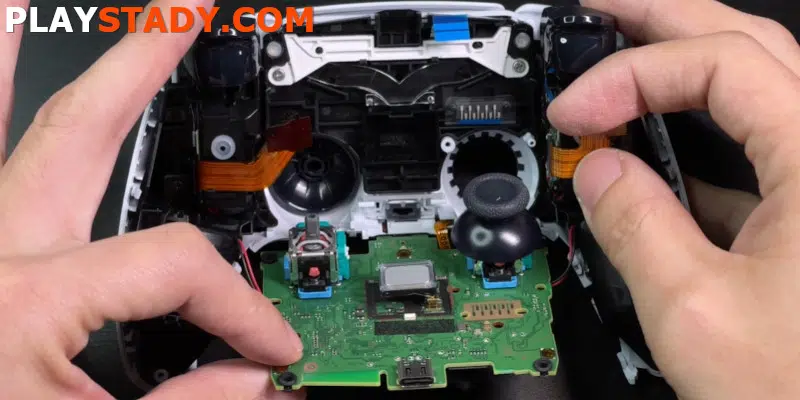
Board
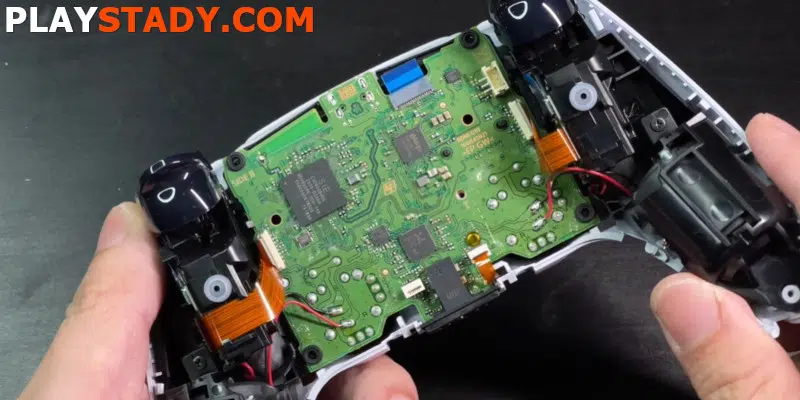
You have a fully exposed motherboard in front of you. You can wipe it with an anti-static brush, but don’t use wet wipes, as moisture and lint particles can get on the board.
At this point, you need to work again with tweezers and disconnect the loops. There are four of them, located on each of the four sides of the board, approximately in the center. Two are bright copper-colored and are on the sides of the buttons. Another small one is at the very bottom, to the right of the headphone input. The last one is blue and is at the top, a little to the right of the center.
Top Panel
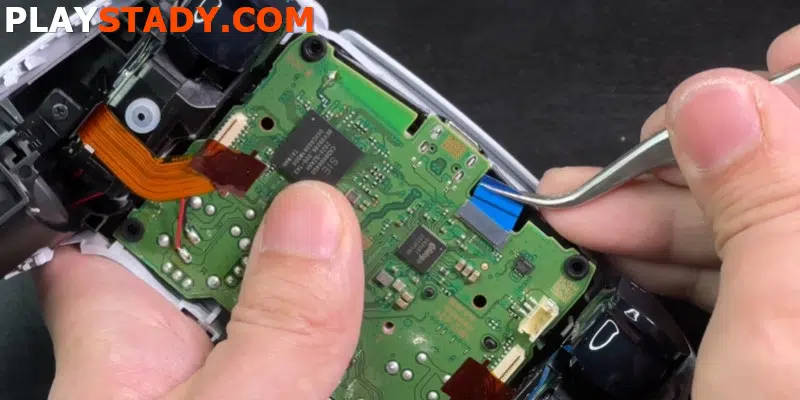
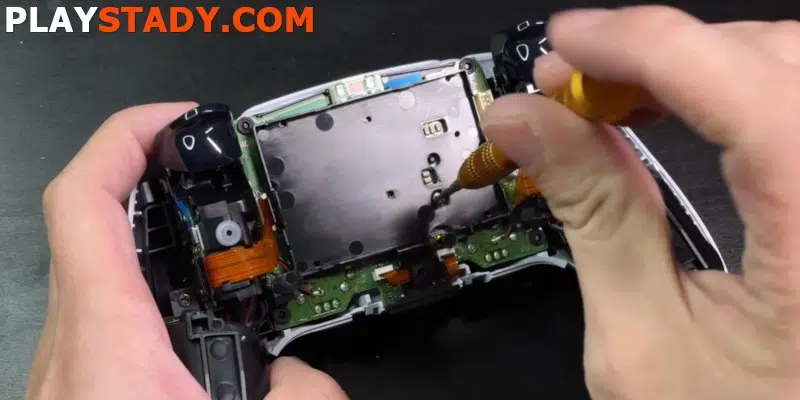
The responsible thing is that the motherboard cannot be removed because it is soldered to the vibrator. Carefully forge the board from the top, near the blue cable, and turn it upside down. Now the control sticks should be facing you, and the PS5 gamepad processors should be facing down. At the very top, there is a white panel held by two screws. Unscrew them, and remove them. At the bottom, there will be another transparent panel, which you also need to remove.
Between the vibrating motors and the buttons, there are screws in special square sockets. After unscrewing them, grab the motor housing and lift – the outer casing with the buttons remains below. Next, we rotate the inner part of the device and unscrew the screws. There are two of them near each of the triggers highlighted in blue. The triggers, which are modular buttons, do not hold anything. Remove them.
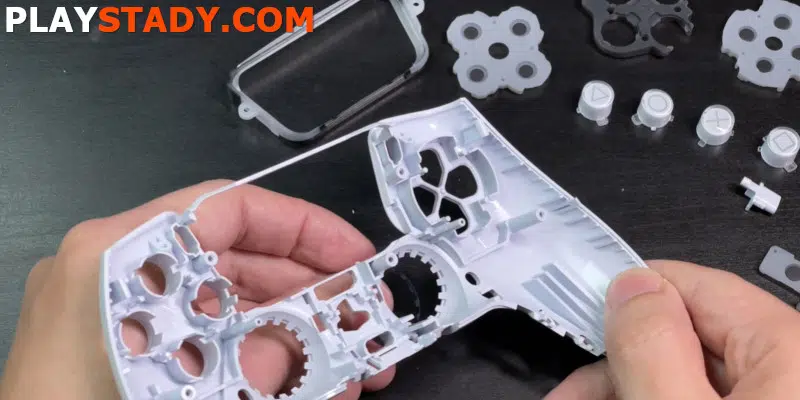
Touchpad and Buttons
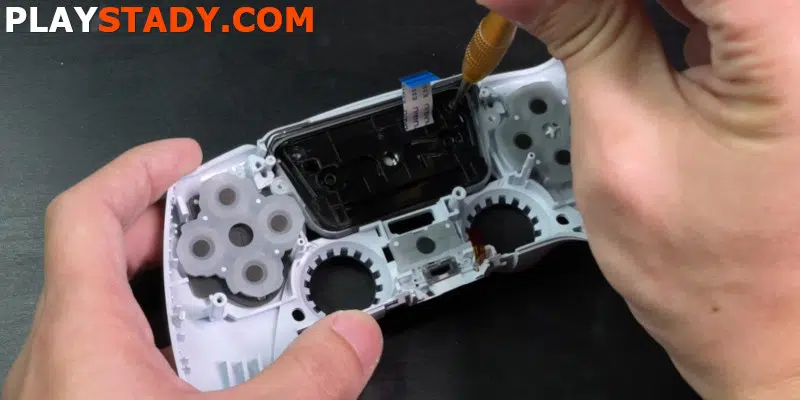
There is still a trackpad on the removed front panel. The protection board is easy to remove. Just unscrew the two screws at the top. Under it, there is a board with chips. If you decide to wipe it, act carefully.
All buttons are removable with tweezers without any difficulty. You can wash or replace it if you want, as the buttons are separate.
Triggers
The triggers can also be disassembled. To do this, find the three screws on them and remove them. Then on the backside, disconnect the blue cable. Under it, there will be another screw. Now it is enough to pull the black plastic part of the case and remove it. In front of you, there is an updated trigger with a system of gears in front of you, which allows you to improve the response and tactile sensation significantly. If you don’t want to disassemble further, blow the can of air to clean the PS5 controller, it will be enough. The gears are removed by simply lifting, and each of them can be removed and replaced if necessary. The second trigger is teardown in the same way.
How to Change Parts
Also, if specific gamepad components are out of order, they can be replaced. If there is a warranty, this is done in the service center. The main thing is that it is not a mechanical failure. If the problem is not under warranty, you should deal with it yourself. All parts can be easily bought in local online stores or on AliExpress.
Battery
If the battery does not hold well and after an hour (or earlier), the joystick shows that it is time to recharge, you should think about replacing it. The battery is disconnected without any problems. It is held by one contact. Disconnect plug, and it’s done. The new battery is put in reverse order.
Vibration Motors
Repairing the PS5 joystick immediately complicates the task – you need skills in handling a soldering iron. Also, note that the motors are glued, and you have to tear them off. Instead, the problem is with the red wires that prevent you from removing the motherboard. These are soldered to the vibration motors. But it is not hard to unsolder them, the soldering point is rather big, and the main thing is not to overheat the board (don’t hold the soldering iron needle on the case for a long time, it is better to do it in several steps).
Sticks
You can remove the overlay buttons. They are easy to pry off. But to replace the analogs again, you will need to solder – on the backside. There is a circular group of contacts. The change is quite simple – the old analog is unsoldered, and the new one has to be “planted” in the same place and soldered.
If the Button Doesn’t Work or Stuck
If you spilled liquid on your gamepad not too long ago and then one or more of the buttons stop working, the blue conductive film may be the problem. Its replacement does not require any skills – buy the same one and install it in the same place.
It could also be due to poor contact. After removing the black silicone pads, rinse them with plain water. Do not use alcohol or rough-coated sponges. These can wipe off the conductive layer. This method is also a good help if the DualDense has started to stick to the buttons.
If You Spill Liquid on Your Gamepad
It is pretty easy to clean the PS5 controller from dust, more complicated if the liquid gets inside, especially sweet because it tends to stick and can be sugary. As a result, the buttons can stick, and in general, it is better to get rid of the consequences of the stay inside the body of the liquid. It would be best if you did the following:
- All the cables must be removed and wiped down;
- Also, don’t forget the rubber microphone retainer and connectors;
- The motherboard, trackpad, and sticky elements should be carefully wiped with a particular paper towel. Please do not move it from edge to edge, but try to wipe it, touching each place separately. This will significantly reduce the risk of hitting small parts of the motherboard;
- Like the control buttons, all removable plastic protectors can be washed and dried in isopropyl alcohol. Do not forget about the black frame, where the triggers are mounted – there are a lot of embossed elements on it. You can use a regular cotton swab;
- Pay attention to cleaning the blue conductive film on the front side, near the control buttons. Wipe it only with cotton pads or paper towels. Do not use water or alcohol. It will not help – here, graphite is used as contact coating, which can be washed off at all;
- But the contacts of vibration motors and analogs should be wiped with cotton swabs with isopropyl alcohol, preventing oxidation. This will help to remove all unnecessary chemical compounds and is safe for electronic components;
- If there is even the slightest trace of moisture on the triggers, it is worth disassembling them and cleaning each gear and panel.
Video Instructions
We strongly recommend not to open the case yourself for repair if the gamepad is still under warranty or you do not have sufficient soldering skills. However, if you do everything carefully, you can disassemble and reassemble PS5 DualSense gamepad after the initial inspection and cleaning within an hour because the controller design is quite simple.


Egor Borisov
PS3 Slim, PS4 Pro, and PS5 owner. I disassemble, clean, and modify consoles and controllers. I share my experiences on this site and tell you about the new console generation.